Samstag, 21. Dezember 2013

Gandalf auf Karren / Gandalf on cart

Hallo allerseits,

ich habe gestern Gandalf auf Karren von Citadel fertiggestellt. Es handelt sich noch um die Zinnversion, die Brücke stammt von eBob-Miniatures und ist das Weihnachtsgeschenk für meinen Vater. Die Bilder hat netterweise ein Freund von mir gemacht, an dieser Stelle vielen Dank!

Hello everyone,

I finished Gandalf on cart from Citadel yesterday. The model is the old tin version, the bridge was done by eBob-Miniatures and it is a Christmas Gift for my dad. The pictures took a friend of mine, thanks for that!


 Dieses Jahr wird wahrscheinlich nichts mehr kommen, ich bin immer noch dabei, das Diorama von der Bruinenfurt fertigzustellen, also...

This year there will probably not come any progress as I am still working on the diorama of the ford of Bruinen so...


Freitag, 13. Dezember 2013

Gandalf Sockel / Plinth

Ich bin mit dem Sockel für Gandalf auf Karren fertig geworden. Der Sockel und die Brücke stammen von eBob - Miniatures. Ich hatte das Glück, den letzten Sockel zu erwischen...
Leider sieht man von den Wassereffekten nicht viel, sie sind aber vorhanden. ;-)

I have finished a display plinth for Gandalf on cart. The brigde and the plinth are made by eBob-miniatures and I was happy to get the last one with the plinth.
Unfortunately the water effects are not vizible, but they exist. ;-)


Ich hoffe, sie gefällt Euch. Über ein paar Kommentare würde ich mich auch freuen...

I hope you like it. Comments are very welcome...

Samstag, 7. Dezember 2013

Hobbit Poster

Das ist eine Tontrennung des Hobbit Posters, die ich im letzten Jahr im Kunstunterricht erstellt habe. Eine Tontrennung ist einfach ein schwarz-weiß Bild, nur das man halt nur schwarz und weiß, jedoch keine Graustufen hat. Die Umrisse wurden mehr oder weniger "abgepaust" und dann mit Edding bemalt.

This is a posterization I did in art classes last year. A posterization is simply a black and white picture, with the only difference that there is just black and white and no grey. The silhouettes are traced and then painted with a black Edding.

Ich hoffe, es gefällt Euch!

I hope you like it!

Montag, 2. Dezember 2013

Erster Pferdekopf / First Horsehead

Ich bin mit meinem ersten Pferdekopf für die Wasserpferde aus der Bruinenfurt fertig geworden. Er ist aus Milliput modelliert und mein 3. Versuch. Die ersten zwei waren größer und eher zu Anatomiezwecken geeignet, benutzen werde ich sie nicht mehr (deswegen auch der Ziegenbart bei dem einen...)

I have finished my first horse head for the diorama of the fords of Bruinen. It is sculpted with milliput and it is my third try. The first two were bigger and used for anatomical studies, I wont use them anymore (that is why one of those has a moustache...)


Hier einmal ein schnelles Bild mit einem Größenvergleich mit der Welle...

Here a fast picture to compare the size with the wave...

... den ersten zwei Versuchen...

... the first two tries...


... und Games Workshop Miniaturen.

... and Games Workshop miniatures.


Die Welle und die Pferdeköpfe werde ich wahrscheinlich aus klarem Resin gießen, ich weiß nur noch nicht, ob man dann die Klebestellen sieht, über Tipps, Tricks und Anmerkungen zum Resingießen würde ich mich sehr freuen!

I will probably cast the wave and the horse heads in clear resin. My question is whether the glueing points will keep visible. Tipps and tricks for resin casting would be great!

Sonntag, 1. Dezember 2013

Nummer eins / Number one

Hier ist mein erster Nazgul für das Bruinenfurt-Diorama, er ist bis auf den Pferdeschweif fertig. Ich bin nicht 100%-ig mit ihm zufrieden, die Übergänge könnten deutlich weicher sein, das Problem ist nur, dass man das bei 9 Nazgul nicht mehr unbedingt sieht und ich auch etwas unter Zeitdruck stehe. Deshalb habe ich versucht, irgendwie einen Mittelweg zu finden, mal gucken, ob ich die anderen auch so bemale. Eine Sache die ich auf jeden Fall wieder gelernt habe: Das gründliche Zusammenbauen, Lückenfüllen, Entgraten und Grundieren macht die Bemalung am Ende deutlich einfacher...

This is my first Nazgul for the diorama of the ford of Bruinen. He is out of the horse tail finished. I am not completely pleased with him, the blendings could be much smoother. The problem is that you do not really see this with nine Nazgul and that I have some time pressure. That is why I tried to find a compromise, I'll see whether I will paint the others the same way. One thing I learned again: The thorough assembling, gap filling, deflashing and priming makes painting much easier...


Ich hoffe, Ihr findet ihn nicht zu hässlich. ;-)

I hope you do not find him too ugly. ;-)

Mittwoch, 27. November 2013

Anleitung: Vom Draht zur Baumarmatur / Tutorial: From wire to a tree armature

Mit dieser Anleitung möchte ich Euch zeigen, wie ich meine Baumarmaturen aus Draht selber herstelle. In einem zweiten Teil, erkläre ich dann die Schritte von der Baumarmatur zum fertigen Baum.

In this tutorial I would like to show you my way of building tree armatures. In a second part I'll explain the steps to the finished tree.

Benötigte Materialien:
- Draht
- 1 Kneifzange
- Geduld
- evtl. ein paar Pflaster ;-)

Needed Materials:
- wire
- pincers
- patience
- maybe some plasters


Schritt 1:

Zuerst muss man die Baumart, die Baumgröße und die Baumdicke festlegen. Danach richtet sich die benötigte Menge und Länge an Draht.
Dann schneidet man entsprechend viele ca. gleichlange Stücke Draht ab, die doppelt so lang sind, wie der Baum (mit Ästen und Wurzeln!) am Ende werden soll. In meinem Fall habe ich 25 Stücke von ca. 25cm Länge abgekniffen. Diese Stücke werden nun alle in der Mitte geknickt.

Step 1:

First you have to decide which tree species you want to do and how tall and thick it shall become. The lenght and the amount of wire depends on this. 
Then you nip of as many pieces of wire with equal lenght as you need. I cutted 25 pieces of wire with about 25cm per piece. Then kink those pieces in the middle. 


Schritt 2:

Als nächstes nimmt man sich ca. 5-7 Stücke Draht und hält sie mit einer Hand an der Knickstelle fest. Mit der anderen Hand werden die zwei Stränge 2-3 Mal mit einander verdreht. Wichtig ist, dass man beide gleichzeitig dreht, nicht den einen um den anderen. Dieser Vorgang wird mit den restlichen Drahtstücken wiederholt. Je länger man dreht, desto länger werden die Wurzeln.

Step 2:

Next up you take about 5-7 pieces of wire and hold them with your one hand in the middle (at the point where you kinked them). With you other hand you start to twist those two cords 2-3 times around each other. Important: Twist both at the same time, not one around the other! The longer you twist, the longer the roots become.


Schritt 3:

Um den Stamm zu erhalten nimmt man jetzt alle zusammen und fängt an zu drehen. Dies ist mMn der schwierigste Teil, da man viel Draht auf einmal drehen muss. Auch hier kann man den Stamm verlängern, indem man öfter dreht.

Step 3:

To build the stem you take all the wire and start twisting again. IMO this is the most difficult part because you have to twist much wire at the same time. If you want to extend the stem you have to twist longer.


Schritt 4:

Der nächste Schritt sind die Äste. Das ist der langwierigste Teil des ganzen. Um einen Ast zu drehen, nimmt man sich 5-9 Stücke Draht (abhängig von der Gesamtmenge) und fängt an, diese miteinander zu verdrehen. Damit die Äste dicker werden, kann man nachträglich noch Draht hinzufügen, einfach ein passendes Stück abknipsen und mit verdrehen. Dabei immer wieder Verästelungen einbauen und mehr Draht hinzufügen. So bekommt man am Ende eine schön verzweigte, glaubwürdige Baumkrone.

Step 4:

The next step are the branches. This is the part that takes the longest time. To build a branch you take 5-9 pieces of wire (depending on how much you have) and start twisting them around each other. To make them thicker you can just add some more pieces of wire. Just cut off a piece with the right size and twist it together with the wire of the branches. To get a realistic treetop you have to add some ramifications.


Schritt 5:

Als letztes kommen die Wurzeln. Dafür werden einfach die "Schlingen" unten am Baum aufgeschnitten und die einzelnen Drahtstücke genau wie die Äste miteinander verdreht. Zuletzt werden sie dann noch so hingebogen, dass der Baum sicher steht.

Step 5:

Finally there are the roots. Simply cut the "slings" at the bottom of the tree open and twist them the way you did with the branches. The very last step (for the tree armature) is to bend them so that the tree has a good stand.


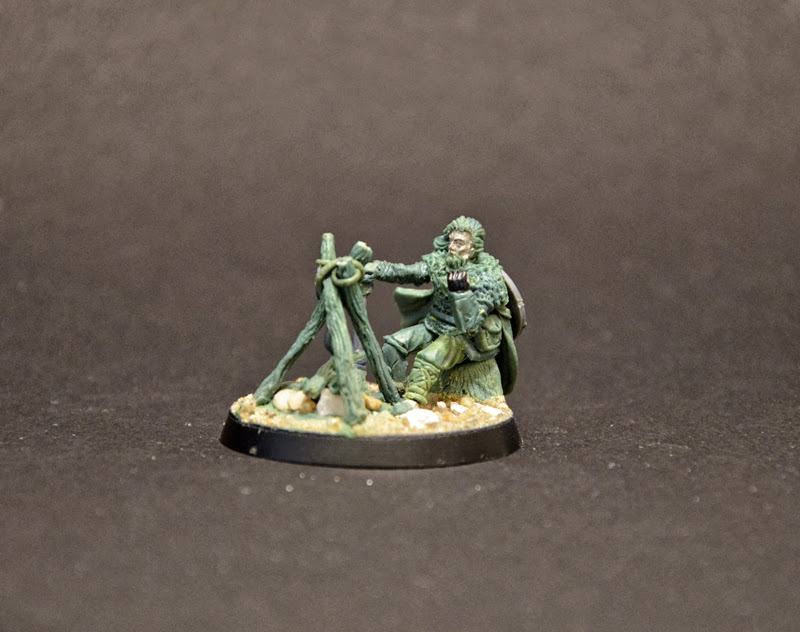
(Das ist schon ein älterer Baum mit noch nichts so vielen Ästen, meinen neusten hab ich immer noch nicht fertig...)

(This is an older tree with not as many branches, my newest is still not finished...)


Diese Bäume sind sicher nicht geeignet um einen ganzen Wald herzustellen, viel mehr für Einzelminiaturen und Dioramen. Man kann sie aber in die unterschiedlichsten Formen bringen und gerade im Fantasy Bereich ist das ziemlich nützlich (alter Weidenmann...). Sie sind bestimmt auch eine gute Grundlage für Ents, ich probiere da gerade auch noch herum. Im nächsten Teil der Anleitung werde ich mich dann mit der Herstellung der Rinde befassen, ob ich noch auf die Beflockung eingehe weiß ich noch nicht (hab ich noch nicht ausprobiert).

These trees are surely to complex for a whole forest, more for single miniatures and dioramas. The advantage (especially in the fantasy world) is that you can give them the very special look you want (Oldman willow). They are probably very good for Ents as well, I am still playing around with them. In the next part of the tutorial I will show you how I make the bark.

Ich hoffe, dem einen oder anderen hat der Artikel gefallen bzw. geholfen.

I hope anybody found this article interesting or helpfull!

Montag, 25. November 2013

Erster Post / First Post

Hallo zusammen, dies ist mein erster Post in meinem ersten Blog. Ich bemale und modelliere Miniaturen überwiegend aus dem "Herr der Ringe" und dem "Der Hobbit" Universum, allerdings werden wahrscheinlich auch ein paar historische Miniaturen (um 1300) dabei sein. Am Anfang zeige ich mal ein paar meiner älteren und neueren Miniaturen. Mal sehen, wohin die Reise führt...

Hello together, this is my first post in my first blog. I paint and sculpt miniatures mainly from the "Lord of the Rings" and "The Hobbit" universe although there will probably come some historical miniatures (about 1300). To start with I will show some of my older and newer miniatures. We'll see, where the journey takes us...


Die obige Miniatur ist ein fiktiver Dunländercharakter. Die Hintergrundgeschichte wurde von einem Mitglied von HdR-Tabletop erfunden, ein einsamer Wanderer, der auf Rache für seine Frau und seinen Sohn aus ist. Das Modell selber wurde mit Green Stuff modelliert, bei dem Umhang handelt es sich um einen Abdruck eines GW-Dunländers. Der Schild wurde von einem Rohansoldaten (ebenfalls Games Workshop) "entliehen". Die Fotos hat MarcK von Jomada-Adventures in Middle Earth gemacht. Vielen Dank dafür!

The miniature shown above is a fictious Dunlending-character. The background story is written by a member of HdR-Tabletop, a lonly wayfarer who is out for revenge for his wife and his son, both killed by rohan soldiers. The model itself was sculpted with Green Stuff, the coat is a copy of a Games Workshop dunlending's coat. The shield was "borrowed" by a rohan soldier. The pictures were taken by MarcK from Jomada - Adventures in Middle Earth. Thanks for that!


Im Gegenzug dafür, dass er Wulfgrimm für mich bemalt hat, habe ich diesen Waldläufer für ihn modelliert. Bilder des bemalten Wulfgrimms findet ihr hier. Die Miniatur besteht wieder aus Green Stuff und beim Mantel handelt es sich um eine Kopie des selben Mantels wie oben. Schwert und Bogen sind von einem Plastik Waldläufer. Der Kopf ist ein modifizierter Kopf einer eBob - Armatur.

In return to the fact, that he painted Wulfgrimm for me, I sculpted this ranger for him. Pictures of the painted Wulfgrimm can be found here. The miniature is made with Green Stuff as well and the coat is a copy of the same one as above. The sword and the bow were taken by a plastic ranger. The head is a overhauled head from an eBob - armature. 

Ich hoffe, die Miniaturen gefallen Euch soweit!

I hope you like the miniatures! (And pleas excuse some grammatical and spelling errors...)